Thursday, April 18, 2013

CONTACT US

We are always happy to answer your questions, give you info about our farm or chat about this years crops! 

We can be reached by email at casalegnofamilyfarm@hotmail.com 

or call us at (831) 476-8032

CHECK US OUT ON FACEBOOK


VISIT OUR FARMSTAND!
Our farmstand is located at 3700 Old San Jose Rd in Soquel and is almost always open.  Stop in from sunup to sundown to stock up on eggs, greens and citrus during winter and all your favorite summer produce like beans, squash, pears apples and tomatoes from July-Dec.

FIND US AT FARMERS MARKETS!
We participate in 3 local farmers markets during our heavy growing season, July-Dec. 

Tuesday - Felton Farmers Market
Wednesday - Downtown Santa Cruz Farmers Market
Saturday - Scotts Valley Farmers Market

For location and times of these markets visit Santa Cruz Community Farmers Market's website.
  

Sunday, March 10, 2013

Late Winter Update

Hello there, just checking in to let you all know what is going on with us!
We always find this time of year to be kind of a strange transition - the broccoli and greens that grew through winter are exhausted and it is too early and unpredictable for summer crops.  That doesn't mean we aren't busy! These are the months we take seed inventory and make orders, interview interns, prune, cover crop, clean and plan.  Right now two of the most exciting things that the longer days are bringing here on the farm are the first seedlings and lots of eggs!

We don't start everything in the greenhouse - certain crops like beans and roots need to be direct sowed, and will have to wait until April when we do our first spring planting.  Other plants must be started indoors - like tomatoes.  We just started over 500 tomato seeds along with lots of flowers, squash and cucumbers, peppers and basil.  Everything is quickly germinating in our warm greenhouse - on warm days it gets close to 100° in there!  But the temp does fluctuate and drops at night so the tomatoes are kept on a large heat mat until they are well up, and since they want so much light we have hanging lights over them that we turn on at dark to give them an extra 4-5 hours/day of light.  This encourages the plants to be strong and bushy rather than forcing them to get tall and spindly in search of light.
Wyatt helping collect eggs


We are also kept busy collecting several dozens of eggs every day and the fridge at our farm stand is stocked with cartons! Our chickens are happily let out to pasture and we supplement their natural diet of plants and bugs with organic feed so these eggs are the very best.


chickens enjoying pasture


our gorgeous eggs
Meyer Lemons
 .


Along with eggs ($6/dz) we still have some yummy citrus - Meyer lemons and oranges - for sale as well as a nice selection of Jeannie's Artisan Jams.  And we have been selling some really wonderful chicken coops and planter boxes made by our friends at Hidden Fortress Micro Farm.  Using repurposed materials their coops and boxes are really well made and affordable.  They have a great operation, check out their fresh roasted organic fair trade coffee!


Hidden Fortress Micro Farms mini coop


Planter boxes


We will keep you posted as we approach the growing season and be sure to send out CSA info as soon as we have it!


Saturday, November 3, 2012

Weekly Newsletter


I am so pleased that we still have tomatoes to put in the boxes this week! The little bit of rain hasn’t affected them too much, considering how late in the season it is.  The latest planting of beans still seems to be going pretty strong too.  We are already picking the first persimmons now, they are a little on the early side this year.  I am so glad we will have plenty of ripe ones for Thanksgiving – we always sell quite a few at the downtown farmers market the day before.  There really are so many great things to do with them, I will definitely share ideas soon!

Winter Squash and Kale Soup with Bacon

I hope last weeks winter squash tips inspired everyone to get creative and use their winter squash! Here is another great way to use it that will warm you up on these chilly nights!

Ingredients

·                     4 strips bacon
·                     1 medium onion, finely chopped
·                     1 bunch kale, thick stems removed, leaves finely chopped
·                     4 cups winter squash puree (about 2 squash, or 4 lbs).  I recommend that you halve and roast the squash, but you can simply bake them whole or microwave them. Either way, once cooked scoop out flesh and puree. 
·                     3 cups chicken broth
·                     Coarse salt and ground pepper

Directions

1.                  Cook bacon in a large saucepan over medium heat, stirring occasionally, until crisp, 4 to 5 minutes. Using a slotted spoon, transfer bacon to a paper-towel-lined plate; set aside.
2.                  Add onion to bacon pan, and cook until softened, 4 to 5 minutes. Add kale; cook until soft, 3 to 4 minutes.
3.                  Add squash puree and chicken broth  (add more if necessary to achieve desired consistency); bring just to a boil. Season generously with salt and pepper. Serve, garnished with reserved bacon.


Baked Apples

·                     4 apples
·                     1/4 cup brown sugar
·                     1 teaspoon cinnamon
·                     1/4 cup chopped pecans
·                     1/4 cup currants or chopped raisins
·                     1 Tbsp butter
·                     3/4 cup boiling water
1 Preheat oven to 375°F. Wash apples. Remove cores to 1/2 inch of the bottom of the apples. It helps if you have an apple corer, but if not, you can use a paring knife to cut out first the stem area, and then the core. Use a spoon to dig out the seeds. Make the holes about 3/4-inch to an inch wide.
2 In a small bowl, combine the sugar, cinnamon, currants/raisins, and pecans. Place apples in a 8x8-inch square baking pan. Stuff each apple with this mixture. Top with a dot of butter (1/4 of the Tbps).
3 Add boiling water to the baking pan. Bake 30-40 minutes, until tender, but not mushy. Remove from the oven and baste the apples several times with the pan juices.
Serve warm with vanilla ice cream on the side.


Hachiya (left) and Fuyu (right)
PERSIMMONS
This week you are receiving both types of persimmons we grow here on the farm -  FUYU  and HACHIYA. Fuyu’s can be eaten when firm and crisp like an apple, unlike their cousin the Hachiya, which must ripen to a very soft and jellylike state before using.  The 2 types can be distinguished from one another by their different shapes.  Hachiya’s are sort of teardrop shaped with a pointy bottom, whereas Fuyus have a more squat shape with a flatter bottom.  The Fuyu’s are ready to go – eat out of hand or try slicing some into a salad or tossing with apples, raisins and nuts for a yummy mix.  The Hachiyas will need some time to ripen.  The best way to do it is to lay them on their stem end on a dish or tray with 1 apple for every 3 persimmons, then wrap tightly with an opaque plastic bag and keep at room temp.  They will be ripe in 7-10 days this way.  If left in a fruit bowl they may take longer and not ripen as uniformly.  When ripe there are many ways to enjoy them! I will share some ideas and favorite recipes next week when they are all ready to use.            

Saturday, October 27, 2012

Weekly Newsletter


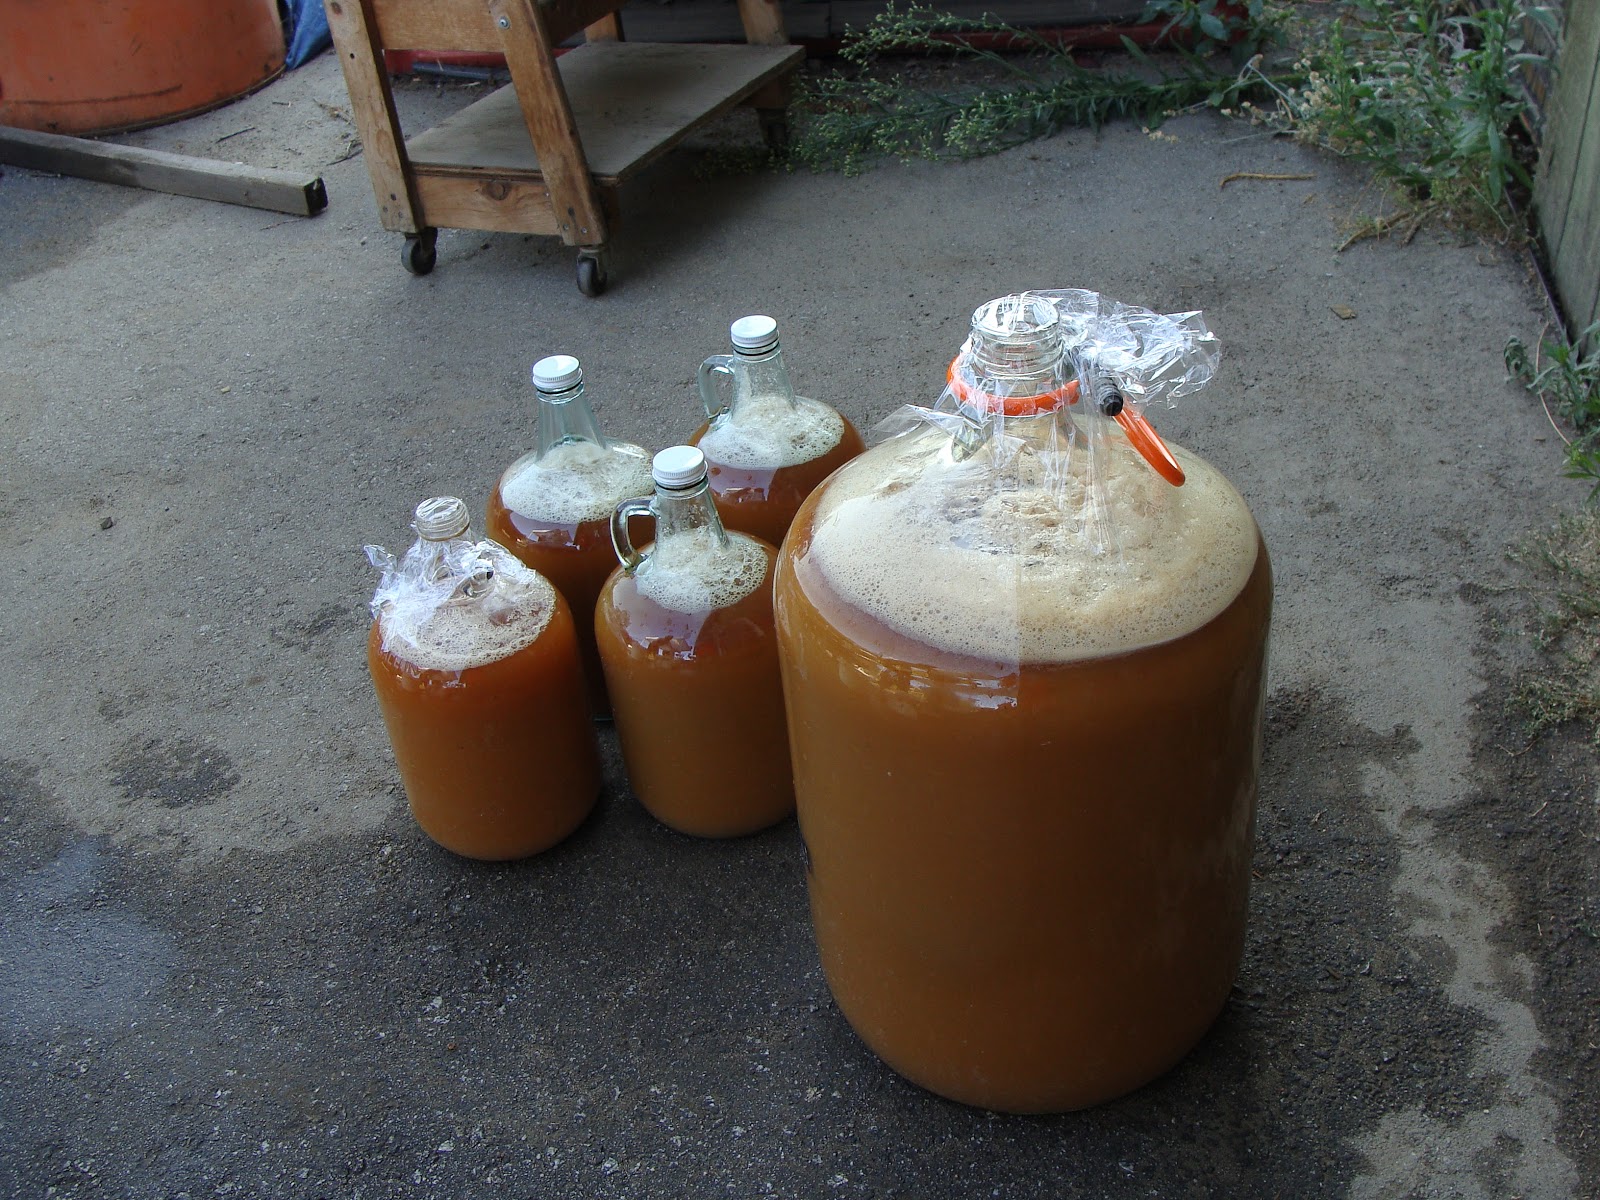
I finally found a little time to sit down and write a newsletter! I apologize for letting it go.  Life is just so busy as I am sure you all know.  But I really enjoy doing it especially since I know many of you appreciate the information, updates and recipes.  Hard to believe it is that time already, but for all except our full-season members today is the final box pick up.  It has been an eventful and successful year, and now we find ourselves deep in the depths of apple season, which means lots of picking and sorting.  We have even got our 5-year-old Wyatt involved in helping – we pay him 25 cents a bucket to pick up the windfall (or ground) apples.  These are the only apples we sell to Martinellis for juice.  The rest of the “culls” or “seconds” we press ourselves., or to fill orders for others, mostly to make hard cider.  We had such great feedback from last year’s students that we are once again offering our Beginning Hard Cider Classes here a the farm – I have printed the flyer for anyone that might want it.  As CSA members we will extend an extra special couples deal for anyone that signs up.  It really is fun and easy, and a great way to spend time together learning something new.  If you are interested or know anyone that might be please feel free to spread the word.  We are trying to keep the stand stocked with glass jars of fresh pressed cider (never frozen!) as well as another welcome addition – eggs! The hens have really started to lay and w are getting several extra dozens every week.   I just hope they keep it up as the days get shorter.   Thank you so much for helping us through another wonderful year.  We plan to have the farm stand open indefinitely – there should be eggs and cider of course and there are still plenty of apples to come off the trees as well as persimmons in November in addition to winter crops and hopefully some holiday wreaths too.  Enjoy the season and we will see you all soon!

Winter Squash

You have all been receiving several pounds of winter squash in your boxes over the last couple weeks.  If you have not used it yet because you are unsure of what to do with it, never fear! I am here with some info about each type and some ideas of what to do with them.  Generally to prepare them for any recipe they should be cut in half lengthwise, and the seeds and pulp should be scraped out with a spoon. 
Delicata A really wonderful tender tasty squash! I think a friend summed it up perfectly “If Butternut Squash was even more awesome it would be a Delicata”. My favorite way to eat: Start by cutting off the ends and peeling the squash.  Then Prepare squash and slice into 1” pieces (they will be kind of crescent shaped).  Put into a baking dish and using your hands coat pretty heavily with olive oil.  Sprinkle generously with salt and pepper and roast at 425° for about 20 minutes, or until tender and golden brown on bottoms.  Sprinkle with more salt if needed and enjoy! Better than sweet potato fries!

Butternut Squash – Is probably the most commonly known and used winter squash.  It is really wonderful roasted as well.  Here is another yummy way to make roasted squash.  Peel and Prepare 1 medium butternut squash, cut into large uniform chunks.  Coat with 4 tablespoons melted and cooled butter, 2 TB packed light brown sugar, ¾  teaspoons salt and1 teaspoon fresh ground black pepper.  Spread out in a single layer on a baking sheet.  Roast for 45 to 55 minutes, until the squash is tender and the glaze begins to caramelize.  Turn the squash while roasting a few times with a spatula to be sure it browns evenly.


Buttercup Squash Part of the Turban Squash family this dark green flattish squash has a sweet nutty flavor.  Prepare squash, (do not peel) place cut side up in a baking dish.  Make a mixture of ½ cup chopped tart apple, 2 tsp packed brown sugar, 2 tsp butter, softened, ½ teaspoon lemon juice and 1/8  tsp ground nutmeg.  Fill squash halves with mixture, cover and bake at 400° for 40 min or until squash is tender.
Acorn Squash – A particularly nice one for stuffing.  Here is a delicious recipe to try!  Prepare 2 acorn squash.  Place cut side down, in a large baking pan. Bake at 350° for about 45 minutes or until just tender.  In a large skillet, cook ¾ lb bulk sausage, ½ c chopped celery, and ½ c chopped onion until meat is browned and vegetables are tender. Drain well. Combine 1 beaten egg, 1/3 c parmesan cheese, 3 TB brown sugar, and 1 small chopped apple; stir into sausage mixture. Turn squash halves over so the cut side is up. Mound sausage mixture into squash shells. Cover and bake for 20 to 25 minutes more or until sausage mixture is heated through.
Spaghetti Squash - Spaghetti squash works well baked.  Prepare and place cut side down in a baking dish with enough water to cover the bottom of the dish.  Bake at 375°F for 30-40 minutes or until tender.  Use a fork to scrape apart the stringy spaghetti like strands of squash.  Eat like spaghetti – topped with sauce and/or cheese.
Pumpkins – Of course are great for pies, muffins and breads as well as soup and other recipes.  Prepare and bake as the others, until tender, scoop out flesh, puree to make smooth and use in for your thanksgiving pies!

If you still don’t feel ready to use your squash, or want to save them for when the cooler weather comes they will store nicely if kept in a cool, dry, dark place.  Be sure to clean and dry them first and store them no lower than 50°.  Eat Delicata within 6 weeks. Butternut will store for 2-3 months.  Buttercup should be good for 3 months and Spaghetti even longer.


Pasta “with the” Broccoli
This is a recipe my family has made for years.  My great grandmother made it for my grandma who made it for my mother, she made it for me and I now make it for my son.   The Sicilian dialect that flavors my entire families speech has us pronounce our P’s hard, as a B sound – so we have always called it “Basta with the Broccoli”! Hope you enjoy.  It is a simple dish full of flavor and super healthy too.

1 head of broccoli, trimmed into “florets” (1 lb)
1 big can crushed tomatoes 
1-2 cups chicken broth
6 cloves garlic, pressed or minced
olive oil
salt and pepper
I lb spaghetti

In a large pot of boiling water cook broccoli for 5 minutes just to par boil.  Meanwhile heat oil over med heat  in a large pan and sauté garlic but don’t brown.  Using a slotted spoon or sieve remove broccoli from water and place in pan with garlic.  Don’t dump water – bring back to a boil.  Cook spaghetti until al dente in the broccoli water.    Sauté broccoli in garlic for a few minutes then add can of tomatoes, chicken broth, salt and pepper to taste.   Bring to a boil, reduce heat and simmer until spaghetti is done.  Drain spaghetti and toss with broccoli.  Top with more pepper and parmesan cheese.


Thank you all once again! Keep in touch and don’t forget to check our website this winter for any updates and news.  casalegnofarm.blogspot.com

Wednesday, October 24, 2012

Beginning Hard Cider Classes and Apple Pressing Sessions


We are once again offering our popular small group classes!


Our hands on Beginning Hard Cider class will teach you all the basics of hard cider making. Join us for a few hours as we press apples into fresh juice, talk about different types of apples and learn fermenting techniques.  Everyone will leave with at least 5 gallons of cider and take home instructions. Perfect for beginners! We are also happy to reserve classes for your group.

Dates: 2012 Classes will be held on the following Sundays:
November 4, November 11, November 18, December 2, December 16 and December 30. 
All class dates are subject to change based on enrollment.
Attend a class on or before December 2 in order for your cider to be ready by the holidays!

Location: Casalegno Family Farm Stand 3700 Old San Jose Road in Soquel.

Time: 10:30 – 1:30

Price: $70 total  -  $35 for the class plus a minimum 5-gallon cider purchase ($35) to use for your hard cider.  We require a $20 deposit to reserve your spot.
Additional cider can also be purchased.  Ask about our reduced price for couples. 

Equipment needed: Bring a 5-gallon glass carboy or food grade plastic bucket with rubber seal and airlock.  
Visit Seven Bridges Cooperative on River Street for all your equipment!

Please contact us with any questions or for more details. casalegnofamilyfarm@hotmail.com or call 476-8032

If you are already experienced in cider making and are looking for a source for fresh juice or would just like to spend an afternoon on the farm this is a great opportunity to get the apple juice you need for your own uses. 
We also sell cider apples!  Contact us for prices or to set up a date!


Friday, August 17, 2012

Weekly Newsletter 4 (week 6)


August 12-18, 2012

Last Sunday was the first apple press of the season here at the farm.  The Gravensteins made a really tangy, crisp delicious cider! Of course it is great for drinking fresh, but can also be used in cooking as well as to make hard cider.  This traditional alcoholic drink is part of our countries heritage.  It was the main beverage served with meals during colonial times because water was often unsafe.  There are many theories as to why it has lost popularity in this country, one of which being that when German immigrants arrived in the 1840s and 1850s they brought with them superior methods of brewing which produced better beers and thus replaced cider with beer.  Hard cider is still very commonly drank in the pubs of Britain, and as the urban homesteading movement continues to gain momentum we see more people interested in drinking and making this awesome beverage.   Last year we had a lot of success with the Beginning Hard Cider classes we offered here at the farm.  Our affordable, fun, hands-on class is a great way to spend an afternoon and students go home with all the basic knowledge they will need to make their own hard cider, as well as 5 gallons of their own to get started.  We will be scheduling classes later this summer and into the fall so look out for more information if this is something you might be interested in trying out.  For now you can purchase sweet cider at the stand to enjoy - look for it in the fridge.


In this weeks full share box:

Red Gravenstein apples
Bartlett Pears
Basket of Satsuma plums
Heirloom & early girl tomatoes
Basket of cherry tomatoes 
Blue Lake, Romano & Trionfo Violetto beans
Lemon cucumbers
Bell peppers
Basket of Padron  peppers 
Zucchini & summer squash 
Chard or Kale
Lettuce 
Basil
Red onion


Pork Tenderloin with Apples
2 pork tenderloins
2 cloves garlic, slivered
salt and pepper
2 tsp ground cumin
2 tb oil
1 cup broth (chicken or beef)
1 cup apple cider
2 medium sized apples, peeled, cored and sliced
Preheat oven to 400° F. With the tip of a sharp knife, make deep little slits all over the tenderloin and insert the garlic slivers. Season with salt, pepper and cumin. • Heat the oil in a skillet on medium high heat and sear the tenderloin well on all sides (about 10 minutes). •Remove the tenderloins from the skillet (do not discard the juices in the skillet) and place in a roasting pan. Add the broth and white wine to the roasting pan. Cook in the oven at 400°F for 10 minutes.  •After you've placed the tenderloins in the oven, cook the apple slices in the same skillet (with the remaining oil and juices) that you used to brown the tenderloin. Sauté until soft. Remove the apples from the pan, set them aside, saving the juices once again in the pan.  • After the tenderloins have cooked for 10 minutes remove them from the oven. Remove the tenderloins from the pan to a cutting board.     • Pour the roasting pan juices into the skillet and boil everything on high heat for 5 minutes, or until you get a gravy the consistency of melted ice cream.  Adding the sliced apples back to the skillet and mashing some up a little will help to thicken it up.  Stir in a little flour if needed.  • Slice the tenderloin and return to the pan – cook in gravy until no longer pink.  • Place on serving dish, drizzle some gravy over and serve immediately.


PEAR PIE

Those of you that have been with us for a while have no doubt seen me print this recipe before.  And you will see me print it again! It is the easiest most delicious pie ever, and a great way for us to use those overripe, soft, bruised pears that we inevitably end up having.  We try to be sure you all get perfect pears in your boxes, but they are so finickiy it can be tricky not to let any over-ripe ones slip in.  We will always take bad stuff back in the event that this happens, or this recipe is the perfect solution!  Otherwise we are happy to sell you some softies for cheap if you would rather eat the ones in your boxes fresh.
                                     INGREDIENTS
5 or 6 very ripe Bartlett pears, cored, peeled and halved
1 unbaked pie shell (homemade or store bought)
¼ c butter           ½ c sugar            ¼ c flour                
2 eggs          1 tsp vanilla extract
                               INSTRUCTIONS
Preheat oven to 325°
Arrange pear halves in pie shell, rounded side up, with small ends pointed toward the center. (see photo at right)
Beat butter, sugar, flour, eggs and vanilla on high until well blended.
Pour over pears and sprinkle lightly with sesame seeds (optional, but really nice)
Bake 45-50 minutes, til light golden brown on top.


NO BAKE SUMMER LASAGNA

I haven’t tried this one but it sounds good! Of course a traditional baked lasagna (using the no-boil lasagna noodles) layered with squash, basil and tomatoes would be yummy too!

Ingredients

·                     1/2 cup ricotta
·                     3 tablespoons grated Parmesan
·                     3 tablespoons plus 2 teaspoons extra-virgin olive oil
·                     Coarse salt and ground pepper
·                     8 lasagna noodles, broken in half crosswise
·                     1 small garlic clove, minced
·                     4-6 tomatoes, chopped
·                     2 zucchini (about 1 pound total), halved if large and thinly sliced
·                     1 tablespoon torn fresh basil leaves, plus more for serving

Directions

1.                   In a small bowl, combine ricotta, Parmesan, and 2 teaspoons oil; season with salt and pepper. In a large pot of boiling salted water, cook noodles according to package instructions; drain.
2.                   Meanwhile, in a large skillet, heat 2 tablespoons oil over medium-high. Add garlic and tomatoes; season with salt and pepper. Cook, stirring, until slightly broken down, about 3 minutes. Transfer tomatoes to a bowl. Add 1 tablespoon oil and zucchini to skillet; season with salt and pepper. Cook, stirring, until zucchini are tender, about 5 minutes. Transfer to another bowl and stir in basil.
Place some tomatoes on four plates; top with a noodle and small spoonfuls ricotta, zucchini, and more tomatoes. Repeat layering twice, then top with remaining noodles and tomatoes. Garnish with basil.

Saturday, August 11, 2012

Weekly Newsletter 3 (week 5)


August 5-11, 2012

Hello everyone, sorry there has not been a newsletter the last 2 weeks.  Things are just so busy and with 2 little ones at home and I am finding it hard to keep up! As if that were not enough, I arranged all the flowers for a friends wedding last weekend! It was a lot of work but I really enjoyed it and everything turned out beautiful.  Here on the farm things are great, we had our first farmers market of the season up in Felton on Tuesday, and will be down town next week as well.  The summer crops are really coming in now - these cooler evenings, misty mornings and warm temperate days have been ideal conditions so far this summer, let's hope it keeps up!  The tomato vines look amazing, thanks to a lot of hard work and attention, and we are expecting the crop to be abundant.  As many of you may remember, August and September bring on an avalanche of goodness and this is just the start!


 GRAVENSTEIN  (and their cousin red Gravenstein) APPLES
Our earliest apple, the Gravenstein is well known for its versatility as a terrific eating, sauce and pie apple.  With a crisp and juicy texture, and good old-fashioned sweet- tart taste the Gravenstein has been a favorite since it was introduced in North America in the early 1800‘s. They are dense with lots of flavor, which makes them perfect for sauces and pies, and they are crunchy and tasty enough for fresh eating!


Because Bartlett Pears ripen from the inside out they are never ripened on the tree, but picked and left to sit at room temperature to mature at a more even rate.  They are ready to eat when they turn almost completely yellow, begin to soften when gently pressed around the stem end, and give off a sweet aroma.  Place them in your fruit bowl if they are still a bit green, and check them often.  Never place in the fridge to ripen.   They are very delicate and do tend to bruise easily when ripe so be sure to treat them very gently! When properly ripened they are so sweet and juicy and very delicious, but due to their fragile nature this finicky fruit is not widely grown commercially.  Enjoy!


Grilled Veggie Sandwich

·               1/4 cup mayonnaise
·               3 cloves garlic, minced
·               1 tablespoon lemon juice
·               1/8 cup olive oil
·               1 cup sliced bell peppers
·               1 small zucchini, sliced
·               1 red onion, sliced
·               1 small yellow squash, sliced
·               2 (4-x6-inch) focaccia bread pieces, split horizontally
·               1/2 cup crumbled feta cheese, or 2 slices any cheese
·               3 or 4 basil leaves

In a bowl, mix the mayonnaise, minced garlic, and lemon juice.   Set aside in the refrigerator.   Preheat the grill for high heat. Brush vegetables with olive oil on each side. Brush grate with oil. Place bell peppers and zucchini closest to the middle of the grill, and set onion and squash pieces around them. Cook for about 3 minutes, turn, and cook for another 3 minutes. The peppers may take a bit longer. Remove from grill, and set aside. Spread some of the mayonnaise mixture on the cut sides of the bread, and sprinkle each one with feta cheese. Place on the grill cheese side up, and cover with lid for 2 to 3 minutes. This will warm the bread, and slightly melt the cheese. Watch carefully so the bottoms don't burn. Remove from grill, and layer with the vegetables and top with basil leaves.  Enjoy as open-faced grilled sandwiches


Tomato Basil Green Beans
·  3/4 pounds fresh green beans, trimmed
·  1 tablespoons unsalted butter
·  ½  tablespoon olive oil
·  1 small onion thinly sliced
·  2 garlic cloves, minced
·  2 tomatoes, chopped, or 1 basket cherry tomatoes
·  2 TB white wine
·  1 tablespoons thinly sliced fresh basil
·  Salt and freshly ground black pepper
Cook the green beans in a large pot of boiling water until just crisp-tender, about 3 minutes. Drain and rinse in cold water. Drain well; set aside.
Melt the butter and oil in a heavy, large skillet over medium heat.  Add the beans and cook a few minutes. Add the onion and garlic and saute until tender, about 2 minutes.  Add the tomatoes, stir in the wine and basil and cook until the juices evaporate and the beans are tender, stirring often, about 15 minutes. Season with salt and pepper to taste. Transfer to a serving bowl, and serve.